
If you want to know why you should love Mawa Cakes then this post is for you. If you’re already in love with this Mithai Cake (that is what I call my Mawa Cake) then this post is also for you to let you know how you can bake the perfect bakery-style Mawa Cakes. Mawa or Khoya is milk solids. You can get mawa from any nearby dairy store or sweet shop. This is the main ingredient of this cake and cannot be substituted with any other ingredient.
I’ve tasted Mawa Cake the first time in my life when the husband brought them from Pune’s famous Kayani bakery. Those cakes were very simple to me by their look until I took the first bite, then only I realized how different Mawa cake is from plain Vanilla cakes. After that I wished many times to bake them, I browsed the web for recipes. But the baking part never happened.
A few days back I bought some Khoya to make Rawa Laddoos as Diwali was knocking at the door. And after that, some leftover Mawa was lurking at a quiet corner in my refrigerator. What to do with this? was the question on my mind. And then the idea to make Mawa Cakes kicked in. It was no looking back this time, I arranged everything in a jiffy (you need basic ingredients for these cakes except Mawa) and baked a fresh batch of Mawa cakes. My parents are here, so, it’s kinda double happiness for me. Who doesn’t love to feed their parents with homemade stuffs?
The Cakes I baked were perfect in taste and look; the texture was oh so airy! I couldn’t believe my eyes when I was holding the first slice of this cake. Baking perfect bakery-style cakes at home is pure happiness that you must experience. 🙂 I’ve adapted this recipe from here. I followed the original recipe mostly and did some minor changes according to my experience with baking. So, here it goes…


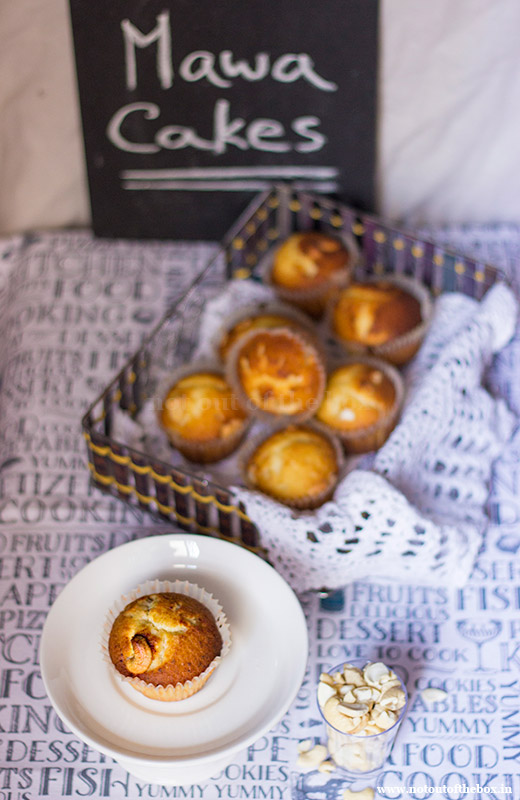
Mawa Cakes
Bakery style Mawa Cakes with great texture and taste, bake them now at home with simple ingredients. Best recipe ever!
Ingredients
- 1 ¼ cups- All-purpose flour/Maida
- 1 cup- White powdered sugar/Caster sugar
- 1 cup/100g- Mawa/Khoya/Milk Solids (grated)
- ½ tsp- Baking powder
- ¼ tsp- Salt
- 2- Eggs
- 6 tbsp- Unsalted butter (softened)
- 8 tbsp- Milk
- To sprinkle on top- Cashew Nuts optional (broken)
- 7- Green cardamom (seeds only, grind them to a powder by using a mortar-pestle)
Instructions
-
All the ingredients were at room temperature before I start.
-
Preheat oven to 180 degrees C. Line a cupcake tin with paper liners. In a bowl mix flour, salt, green cardamom powder, and baking powder, keep aside.
-
In a separate bowl whisk butter and sugar, use an electronic hand mixer for a great result. Add grated mawa into this, whisk again.
-
Add the eggs, one at a time, whisk well.
-
To this add the dry flour mixture in 3 batches, whisk well.
-
Now add milk and keep whisking until a smooth batter forms. You can see some grains into the batter, those are khoya grains, and this much of graininess is absolutely fine, don’t worry. The batter would be thick.
-
Scoop the batter into the prepared cups, about three fourth full and sprinkle some broken cashews on top of the cakes. Bake for 20-25 minutes or until a toothpick inserted in the center comes out clean.
-
After baking transfer the cakes onto a cooling rack and leave there until they cool completely. Store in an airtight container. Keep the Mawa Cakes refrigerated if you’re not consuming all of them on the same day. They stay well up to 1 week.

This post contains affiliate links. If you click the link and make a purchase I will receive a small commission at no cost to you. Visit all my recommended products at Not Out of the Box’s Amazon Shop.


Leave a Reply